Red Velvet Cake for Valentine’s Day
Uitgelicht onder: Dagelijkse bakrecepten
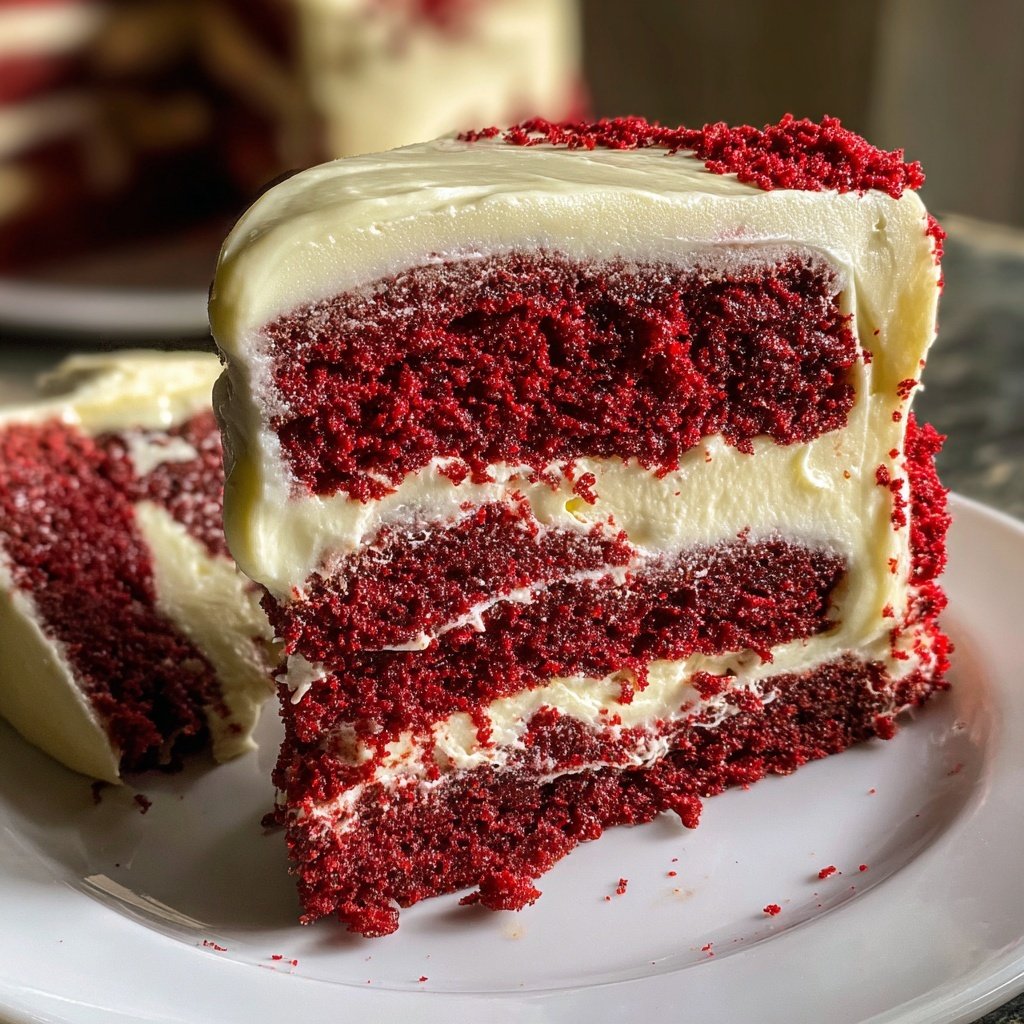
I absolutely adore baking, especially when it comes to creating something as mesmerizing as a Red Velvet Cake for Valentine’s Day. The moment I take the cake out of the oven, I can smell the rich cocoa and the subtle hint of vanilla, which immediately fills the room with warmth. Decorating it with creamy frosting and vibrant red sprinkles makes it not just a dessert, but a work of art. This cake is not only a treat for the taste buds but a visual delight that brings a smile to everyone’s face during celebrations.
When I first attempted to bake a Red Velvet Cake, I was amazed at how the cream cheese frosting perfectly complemented the cake's subtle tang. I used buttermilk in the batter, which not only adds moisture but also enhances the flavor. The trick is to ensure you mix the batter just right—overmixing can lead to a dense cake, and we want it to be light and fluffy!
Moreover, a mix of cocoa powder adds just a touch of richness without overpowering the signature red hue. I remember the first time I brought it to a potluck, and the beautiful color and delicious taste had everyone asking for the recipe. It became my go-to for special occasions!

What You'll Love About This Cake
- Luscious red color that’s perfect for Valentine's Day
- Creamy and tangy frosting that balances the cake's sweetness
- Moist texture that melts in your mouth
Key Techniques for Perfecting Your Red Velvet Cake
Achieving the perfect red velvet cake hinges on the method of mixing. When combining your wet and dry ingredients, it's crucial to mix gently. Overmixing can lead to a denser cake; you want it to be light and airy. Look for a batter that is just combined, without any visible dry flour, to ensure the best texture possible. A few lumps are completely fine—this will yield a moist cake once baked.
Another key technique is in the timing and temperature of your bake. Keep an eye on the cakes as they bake for about 25-30 minutes. An excellent tip is to test for doneness by inserting a toothpick into the center; if it comes out clean or with a few crumbs clinging to it, your cakes are ready. Avoid opening the oven door too early, as this can cause the cakes to sink.
Understanding Ingredient Roles in Red Velvet Cake
The ingredients in your red velvet cake each contribute to its unique flavor and texture. The buttermilk imparts a subtle tanginess that beautifully balances the sweetness of the cake, while the vegetable oil ensures a moist crumb. If you don't have buttermilk on hand, you can make your own by mixing regular milk with a tablespoon of vinegar and letting it sit for about 5-10 minutes. This substitute works well in achieving the same light, tender results.
Cocoa powder serves two functions: it provides the distinctive mild chocolate flavor and also contributes to the signature red hue when combined with the baking soda and vinegar. Make sure to use unsweetened cocoa powder for the best flavor contrast. If you want to experiment, consider swapping in dark cocoa powder for a more intense chocolate flavor, but keep in mind it might deepen the cake’s color.
Storing and Serving Your Red Velvet Cake
After your red velvet cake is baked and frosted, proper storage is key to maintaining its freshness. You can keep the cake covered at room temperature for 1-2 days, but if you need to store it longer, refrigerate it. The creamy frosting can hold up well, and chilling the cake can help it set and make it easier to slice. You can also freeze the cake before frosting; just wrap it tightly in plastic wrap and aluminum foil to avoid freezer burn and use it within 2-3 months.
When it comes to serving, consider pairing your red velvet cake with a scoop of vanilla ice cream or a drizzle of chocolate syrup to enhance the experience. For an elegant touch, garnish with fresh berries or edible flowers, which not only complement the cake’s color but also add a pop of freshness to each slice. You can even customize the sprinkles or toppings based on the occasion to elevate its visual appeal.
Ingrediënten
Gather these ingredients to create your delightful Red Velvet Cake:
For the Cake
- 2 1/2 cups all-purpose flour
- 2 cups granulated sugar
- 1 teaspoon baking soda
- 1 teaspoon salt
- 1 teaspoon cocoa powder
- 1 1/2 cups vegetable oil
- 1 cup buttermilk, room temperature
- 2 large eggs, room temperature
- 2 tablespoons red food coloring
- 1 teaspoon vanilla extract
- 1 teaspoon white vinegar
For the Cream Cheese Frosting
- 8 oz cream cheese, softened
- 1/2 cup unsalted butter, softened
- 4 cups powdered sugar
- 1 teaspoon vanilla extract
- 2-3 tablespoons milk (as needed for consistency)
Bereidingswijze
Let’s dive into the steps to create this scrumptious cake:
Preheat the Oven
Preheat your oven to 350°F (175°C). Grease and flour two 9-inch round cake pans.
Mix Dry Ingredients
In a large bowl, sift together the flour, sugar, baking soda, salt, and cocoa powder.
Combine Wet Ingredients
In another bowl, whisk together the oil, buttermilk, eggs, food coloring, vanilla, and vinegar until well combined.
Combine Dry and Wet Ingredients
Gradually add the wet ingredients to the dry ingredients, mixing gently until just combined. Avoid overmixing.
Bake the Cakes
Pour the batter evenly into the prepared pans. Bake for 25-30 minutes, or until a toothpick inserted comes out clean. Let cool in the pans for 10 minutes before transferring to wire racks.
Prepare the Frosting
While the cakes are cooling, beat together the cream cheese and butter until smooth. Gradually add the powdered sugar and vanilla, mixing until creamy. If the frosting is too thick, add a bit of milk to reach the desired consistency.
Frost the Cake
Once the cakes are completely cool, place one layer on a serving plate and spread a generous amount of frosting on top. Place the second layer on top and frost the top and sides of the cake.
Serve and Enjoy
Decorate as you like and serve your beautiful Red Velvet Cake to loved ones!
Professionele Tips
- For a more vibrant red color, use gel food coloring instead of liquid. This ensures a bold hue without altering the cake's consistency.
Troubleshooting Common Issues
It's common for red velvet cakes to sink in the middle if they have not been baked long enough or if the oven temperature is too low. Always ensure your oven is preheated as specified and that you follow the recommended baking time. If you notice a sunken center, check for doneness with a toothpick and extend baking time in 2-3 minute increments until fully cooked.
If your cake is too dry, it might indicate that it was overbaked. For future bakes, consider checking for doneness a few minutes earlier. Additionally, ensuring precise measurements—particularly for flour—will help avoid this issue. Spoon your flour into the measuring cup and level it off with a knife instead of scooping directly from the bag.
Variations to Try
To add a unique twist to your red velvet cake, consider incorporating flavors such as orange zest or espresso. A splash of orange juice in the batter can provide a citrusy brightness that complements the chocolate notes nicely. If you enjoy coffee flavor, a teaspoon of espresso powder can enhance the cake's richness without overpowering the original flavor, making it even more decadent.
For those wanting a lower sugar option, you can experiment with sugar substitutes that are compatible with baking. Just be sure to check the conversion ratios, as some sweeteners are sweeter than granulated sugar. Additionally, for a gluten-free version, try substituting all-purpose flour with a gluten-free flour blend; just ensure it includes xanthan gum for proper binding.
Celebrating with Red Velvet Cake
Your red velvet cake is not just a treat; it's a centerpiece for celebrations. Consider how you present it—adding garnishes like chocolate shavings or nuts can enhance its visual appeal. For special occasions, think about layering in fillings, such as raspberry jam between the cake layers, which will add a delightful contrast to the creamy frosting.
Don't forget the power of themed decorations! For Valentine's Day, you can decorate with hearts made from chocolate or red candies. Personal touches, like writing a heartfelt message on the cake or using themed cake toppers, can make your creation even more memorable. Such details not only celebrate your baking skills but also convey love and thoughtfulness to those you share it with.
Vragen Over Recepten
→ Can I use a different type of frosting?
Absolutely! While cream cheese frosting is traditional, you can try buttercream or ganache for a different flavor.
→ How can I store the cake?
Store the cake in an airtight container in the refrigerator for up to 5 days. Allow it to come to room temperature before serving.
→ Can I make this cake gluten-free?
Yes, you can substitute all-purpose flour with a gluten-free blend. Ensure the blend has xanthan gum for the best results.
→ What is the origin of Red Velvet Cake?
Red Velvet Cake originated in the United States and gained popularity in the 1920s, particularly in the South.
Red Velvet Cake for Valentine’s Day
Gemaakt door: Kate Phillips
Recepttype: Dagelijkse bakrecepten
Vaardigheidsniveau: Intermediate
Eindportie: 12 servings
Wat je Nodig Hebt
For the Cake
- 2 1/2 cups all-purpose flour
- 2 cups granulated sugar
- 1 teaspoon baking soda
- 1 teaspoon salt
- 1 teaspoon cocoa powder
- 1 1/2 cups vegetable oil
- 1 cup buttermilk, room temperature
- 2 large eggs, room temperature
- 2 tablespoons red food coloring
- 1 teaspoon vanilla extract
- 1 teaspoon white vinegar
For the Cream Cheese Frosting
- 8 oz cream cheese, softened
- 1/2 cup unsalted butter, softened
- 4 cups powdered sugar
- 1 teaspoon vanilla extract
- 2-3 tablespoons milk (as needed for consistency)
Stappen
Preheat your oven to 350°F (175°C). Grease and flour two 9-inch round cake pans.
In a large bowl, sift together the flour, sugar, baking soda, salt, and cocoa powder.
In another bowl, whisk together the oil, buttermilk, eggs, food coloring, vanilla, and vinegar until well combined.
Gradually add the wet ingredients to the dry ingredients, mixing gently until just combined. Avoid overmixing.
Pour the batter evenly into the prepared pans. Bake for 25-30 minutes, or until a toothpick inserted comes out clean. Let cool in the pans for 10 minutes before transferring to wire racks.
While the cakes are cooling, beat together the cream cheese and butter until smooth. Gradually add the powdered sugar and vanilla, mixing until creamy. If the frosting is too thick, add a bit of milk to reach the desired consistency.
Once the cakes are completely cool, place one layer on a serving plate and spread a generous amount of frosting on top. Place the second layer on top and frost the top and sides of the cake.
Decorate as you like and serve your beautiful Red Velvet Cake to loved ones!
Extra Tips
- For a more vibrant red color, use gel food coloring instead of liquid. This ensures a bold hue without altering the cake's consistency.
Voedingswaarde (Per Portie)
- Calories: 380 kcal
- Total Fat: 26g
- Saturated Fat: 15g
- Cholesterol: 195mg
- Sodium: 85mg
- Total Carbohydrates: 32g
- Dietary Fiber: 3g
- Sugars: 24g
- Protein: 6g