Classic Chocolate Lava Cakes
Uitgelicht onder: Dagelijkse bakrecepten
I absolutely love indulging in a rich dessert, and these Classic Chocolate Lava Cakes deliver the perfect blend of cake and molten chocolate. The warm melting center is a delightful surprise that takes this dessert to another level. I often whip these up when I want to impress guests or simply treat myself. With just a few simple ingredients and some technique, you'll have a restaurant-quality dessert that feels special without requiring hours in the kitchen. Let's get baking!
Creating these Classic Chocolate Lava Cakes has become a favorite ritual of mine. I enjoy experimenting with different chocolate brands, as it truly affects the flavor of the molten center. For this recipe, I used a high-quality dark chocolate and couldn't believe how rich and decadent the final product turned out!
One tip I learned through trial and error is to avoid overcooking them. The perfect timing is crucial to achieve that gooey center, so keep an eye on your oven. Trust me, nothing beats the moment when you cut into one and that lava flows out!
Why You Will Love This Recipe
- Decadent molten center that oozes with chocolate goodness
- Impressively simple to prepare with just a few ingredients
- Perfect for romantic dinners or a cozy night in
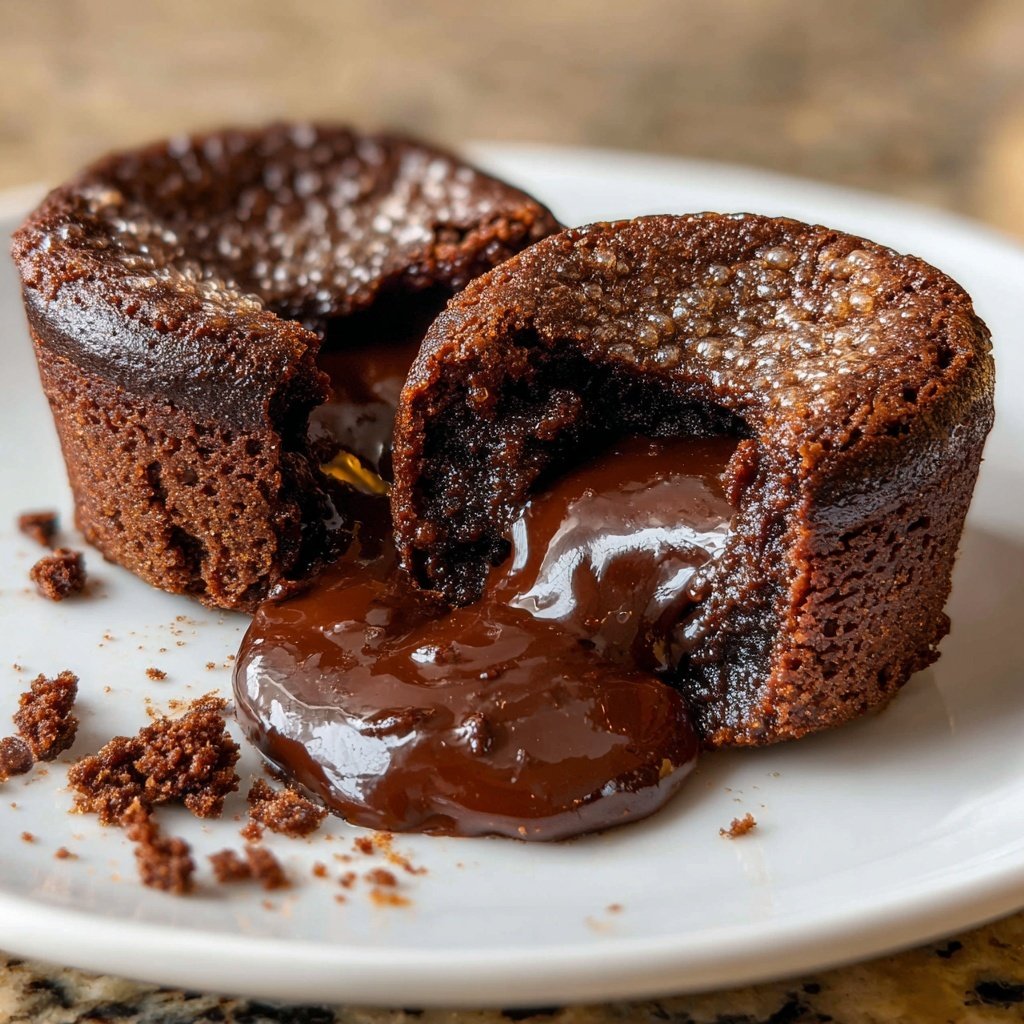
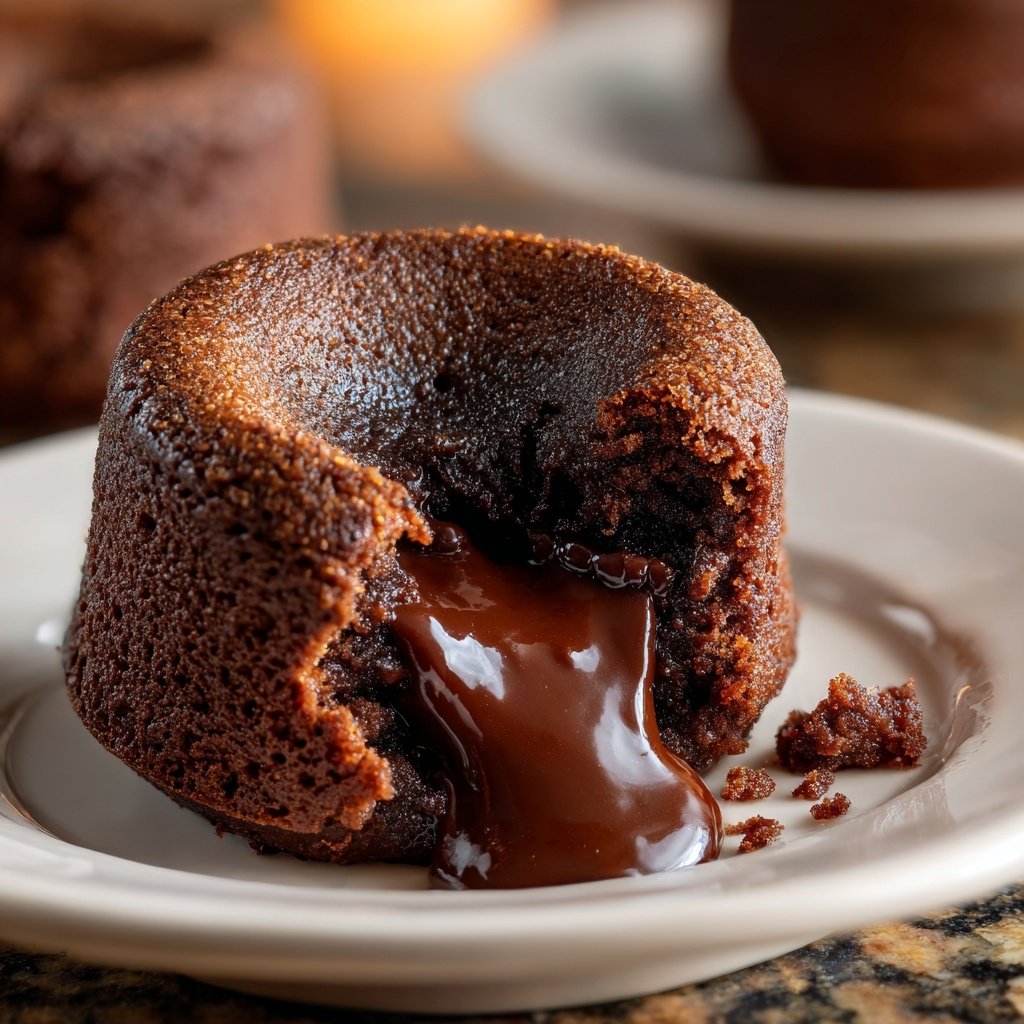
Understanding the Molten Center
The hallmark of a perfect molten lava cake is its oozy chocolate center. This delightful middle layer is created by carefully timing the baking process. If baked too long, the center will solidify, losing its molten quality. Trust your oven timer; 12 minutes is usually the sweet spot. You might want to check it a minute earlier if your oven runs hot, as each oven can vary slightly, leading to inconsistencies in texture.
Using high-quality dark chocolate is crucial for achieving the rich flavor you desire. A chocolate bar that is at least 70% cocoa will provide the depth needed to create that luxurious, molten effect. I recommend chopping the chocolate into small pieces to ensure it melts evenly and incorporates well with the butter, forming a glossy blend that enhances the overall texture.
Ingredient Substitutions and Variations
While this recipe calls for unsalted butter to control the salt level in your cakes, you can substitute with coconut oil or a plant-based butter if you prefer a dairy-free option. Just remember that this might slightly alter the flavor profile, but it will still yield a delicious result. Ensure that any substitute measures are the same as called for in the recipe to maintain the cake’s structure.
For those who want to experiment, try adding a tablespoon of your favorite flavored extract, like almond or orange, to the batter. This addition can enhance the overall taste of the chocolate. You could also consider adding a pinch of instant coffee or espresso powder to deepen the chocolate experience. Just be careful not to overpower the chocolate; a little goes a long way.
Storage and Serving Suggestions
These lava cakes are best served immediately after baking, but you can refrigerate the unbaked batter for up to a day. If you decide to prepare the ramekins ahead of time, simply cover them with plastic wrap after filling and store in the fridge. When you're ready to bake, no need to bring them back to room temperature—just add a couple of minutes to your baking time.
For a touch of elegance, serve your lava cakes with a scoop of vanilla ice cream or a dollop of whipped cream on top. Adding fresh berries or a raspberry coulis can also add a refreshing contrast to the richness of the chocolate. Don’t forget to dust with powdered sugar for a professional finish!
Ingrediënten
Gather these ingredients to make your Lava Cakes:
Ingredients
- 1/2 cup unsalted butter
- 1 cup dark chocolate (70% cocoa), chopped
- 2 large eggs
- 2 large egg yolks
- 1/2 cup granulated sugar
- 1/4 cup all-purpose flour
- 1/4 teaspoon salt
- Powdered sugar for dusting
- Vanilla ice cream (optional for serving)
Make sure to measure everything accurately for the best results!
Bereidingswijze
Follow these steps to create your delicious Lava Cakes:
Preheat the Oven
Preheat your oven to 425°F (218°C). Grease four ramekins with butter and dust with cocoa powder, ensuring an even coating.
Melt Butter and Chocolate
In a microwave-safe bowl, combine the butter and chopped dark chocolate. Heat in the microwave in 30-second intervals, stirring in between, until completely melted and smooth.
Combine Eggs and Sugar
In a separate bowl, whisk together the eggs, egg yolks, and granulated sugar until pale and slightly thickened.
Mix Ingredients Together
Slowly pour the melted chocolate mixture into the egg mixture, stirring to combine. Then, fold in the flour and salt until just incorporated.
Fill Ramekins
Divide the batter among the prepared ramekins, filling them about 3/4 full.
Bake
Bake in the preheated oven for approximately 12 minutes, until the edges are firm but the center remains soft.
Cool and Serve
Let the cakes cool for 1 minute, then carefully invert onto individual plates. Dust with powdered sugar and serve warm, ideally with a scoop of vanilla ice cream.
Enjoy your homemade lava cakes fresh from the oven!
Professionele Tips
- For an added twist, consider adding a pinch of espresso powder to enhance the chocolate flavor, or swap out some of the dark chocolate for milk chocolate for a sweeter taste.
Troubleshooting Common Issues
If your cakes do not rise as expected or appear overly dry, it may be due to overmixing the batter. Be gentle when folding in the flour; overworking the batter develops gluten, which can lead to a denser cake. Aim for just combined to maintain that desired melt-in-your-mouth texture.
Should you find that the cakes are undercooked after 12 minutes, consider your oven calibration. Every oven has its own quirks, so if you suspect it's running cooler, you may need to adjust the temperature or baking time. Investing in an oven thermometer can help ensure you're baking at the right heat.
Scaling the Recipe
Scaling this recipe up or down is quite simple. Each ramekin typically holds around 6 ounces of batter, so if you're looking to make more or fewer servings, adjust the ingredient quantities accordingly. For instance, if you wish to make eight cakes, simply double all the ingredients.
When increasing the batch size, keep in mind that baking time may also vary slightly. Check the cakes a couple of minutes ahead of the recommended time to avoid overbaking, as larger quantities may need more time to set properly. You can also bake them in batches if your oven space is limited.
Vragen Over Recepten
→ Can I make these lava cakes in advance?
While they are best served fresh, you can prepare the batter ahead of time, refrigerate it in the ramekins, and bake them when you're ready.
→ What happens if I overbake the cakes?
If you overbake the cakes, they won't have the gooey center. Keep a close eye and stick to the recommended baking time.
→ Can I use different types of chocolate?
Absolutely! Feel free to experiment with milk chocolate or white chocolate, but adjust the sugar accordingly as milk chocolate is sweeter.
→ Is it necessary to use ramekins?
Ramekins are ideal for even cooking, but you can use muffin tins as an alternative if greased properly.
Classic Chocolate Lava Cakes
Gemaakt door: Kate Phillips
Recepttype: Dagelijkse bakrecepten
Vaardigheidsniveau: Intermediate
Eindportie: 4 servings
Wat je Nodig Hebt
Ingredients
- 1/2 cup unsalted butter
- 1 cup dark chocolate (70% cocoa), chopped
- 2 large eggs
- 2 large egg yolks
- 1/2 cup granulated sugar
- 1/4 cup all-purpose flour
- 1/4 teaspoon salt
- Powdered sugar for dusting
- Vanilla ice cream (optional for serving)
Stappen
Preheat your oven to 425°F (218°C). Grease four ramekins with butter and dust with cocoa powder, ensuring an even coating.
In a microwave-safe bowl, combine the butter and chopped dark chocolate. Heat in the microwave in 30-second intervals, stirring in between, until completely melted and smooth.
In a separate bowl, whisk together the eggs, egg yolks, and granulated sugar until pale and slightly thickened.
Slowly pour the melted chocolate mixture into the egg mixture, stirring to combine. Then, fold in the flour and salt until just incorporated.
Divide the batter among the prepared ramekins, filling them about 3/4 full.
Bake in the preheated oven for approximately 12 minutes, until the edges are firm but the center remains soft.
Let the cakes cool for 1 minute, then carefully invert onto individual plates. Dust with powdered sugar and serve warm, ideally with a scoop of vanilla ice cream.
Extra Tips
- For an added twist, consider adding a pinch of espresso powder to enhance the chocolate flavor, or swap out some of the dark chocolate for milk chocolate for a sweeter taste.
Voedingswaarde (Per Portie)
- Calories: 380 kcal
- Total Fat: 26g
- Saturated Fat: 15g
- Cholesterol: 195mg
- Sodium: 85mg
- Total Carbohydrates: 32g
- Dietary Fiber: 3g
- Sugars: 24g
- Protein: 6g